
Disclaimer: This post contains referral links. This comes at no additional cost to you, but can enable me to unlock more features on my Canva account, enabling me to create more useful content for you. Please consider using those thinks to help support this blogger.
As a small business owner, or a blogger, we like to invest in a good quality logo. A logo should convey what the business is about, as well as should have a special touch that conveys your personal touch as well. In this post, we will make our own Canva logo.
Canva has made it very easy to create your own customized logos, even if you are someone who is not well versed with basic designing skills.
Let us design a logo for a coffee brewing business using Canva. Follow the steps to create your own branding logo
Step 1- Go to canva.com and login. If you haven’t signed up already, use this link: Sign up to Canva.
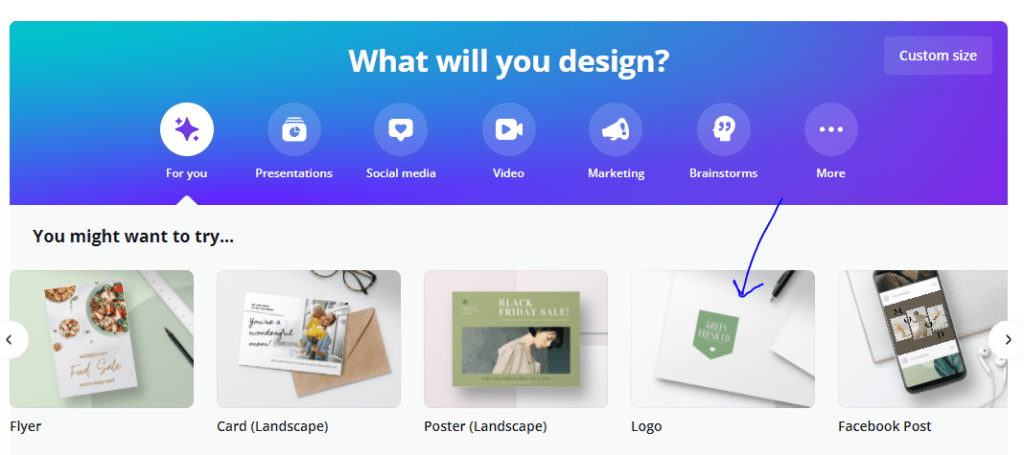
Step 2- When you are signed in, select the option ‘Logo’ under the section ‘What will you design?’
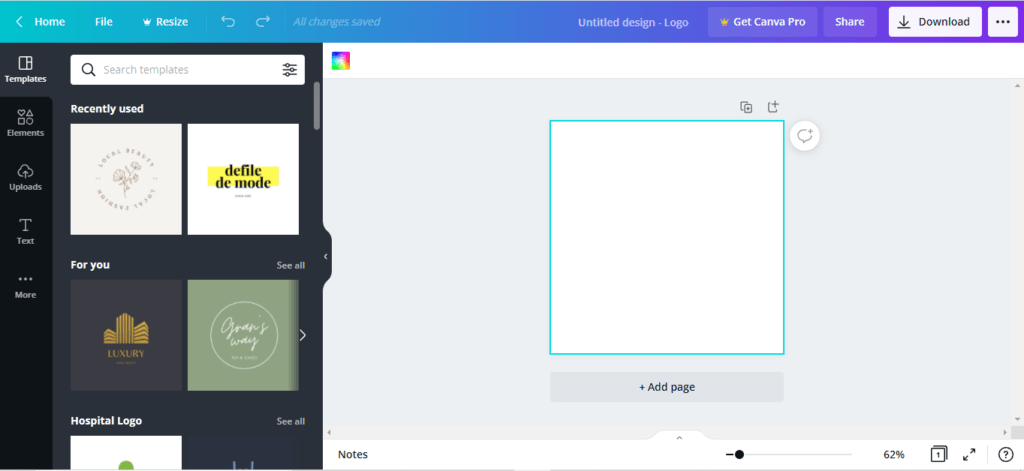
Step 3- The Canva Logo maker will open in a new window. You can either make a new logo from scratch, or use an existing template to tweak and re-use. We will go with the second option.
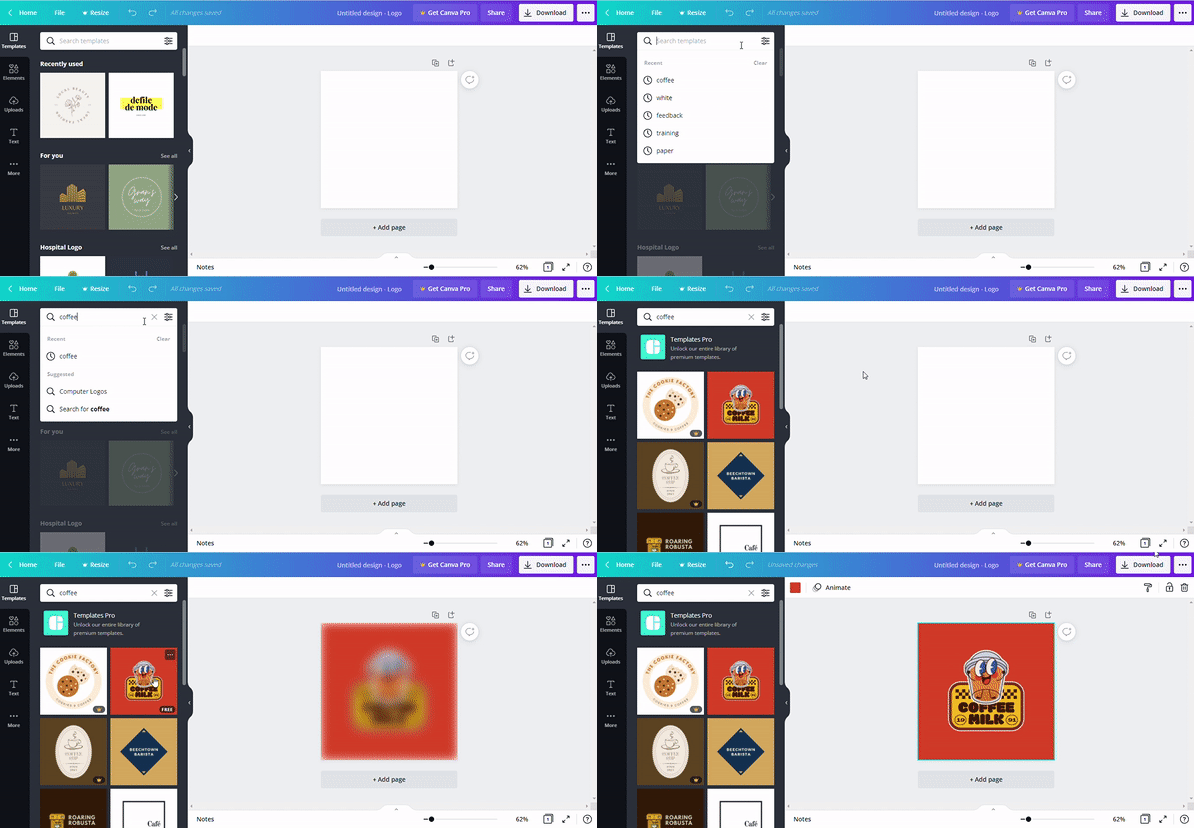
Step 4- Select any design that you think is closer to the logo design you have in mind, or which seems interesting.
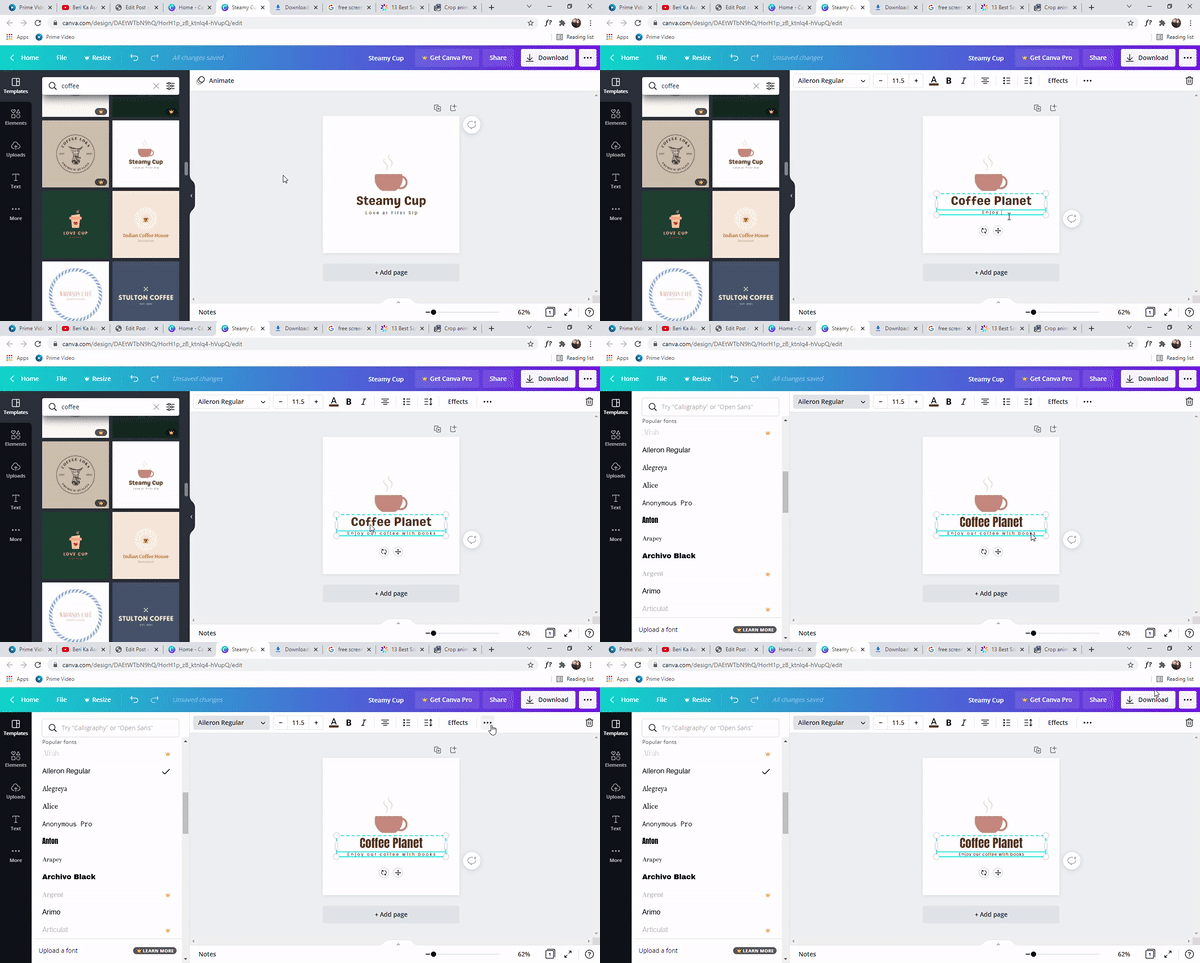
Step 5- Let’s start by adjusting the text. I have selected another design which is more suited to my needs.
Step 6- Now I will tweak the graphic, since the graphic with this template is a premium element. Premium elements can be used only if they are bought. Canva gives us the option to buy individual elements if we do not want to opt for complete Canva Premium package.
For this tutorial, we will be using all free elements.
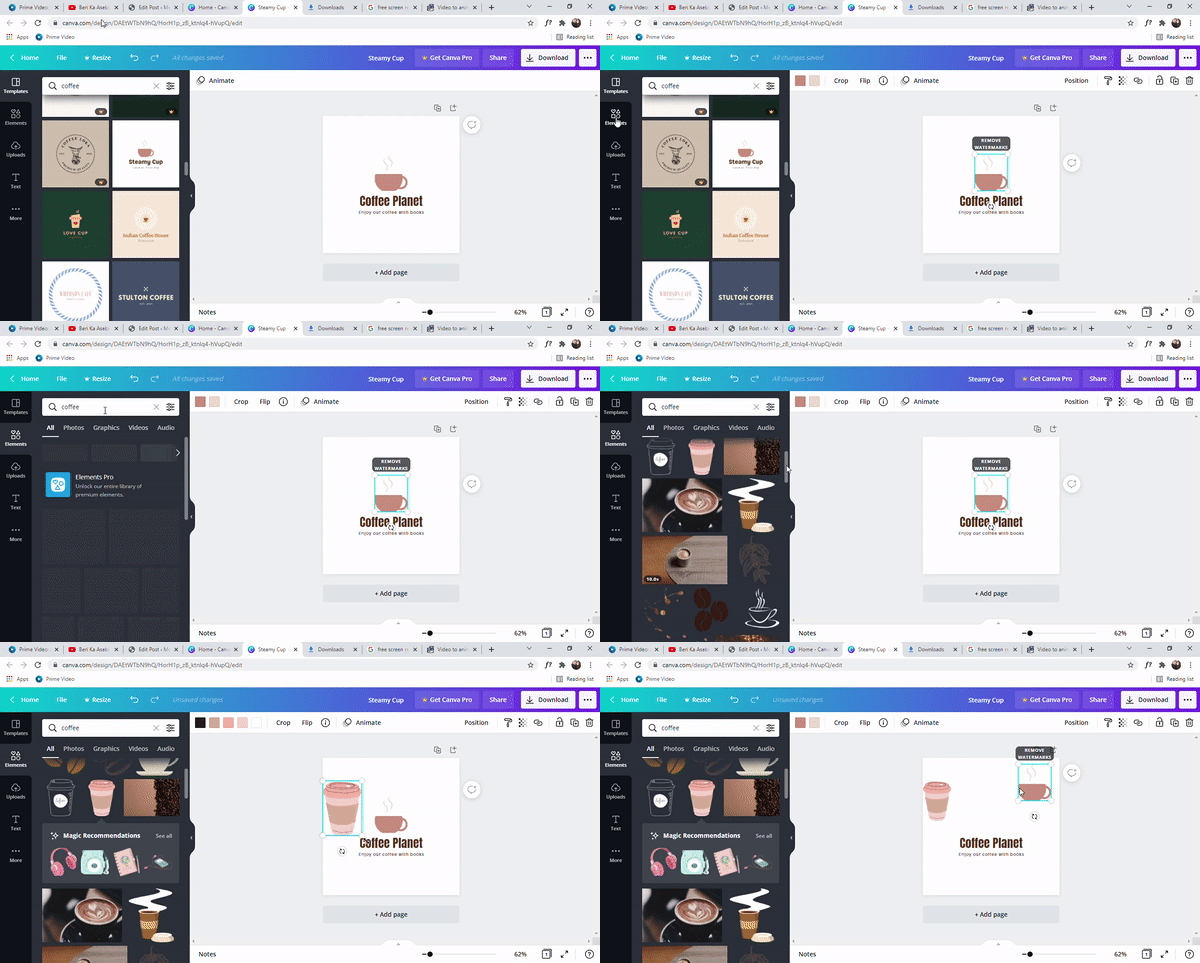
Step 7- Now is the time to extract our logo design.
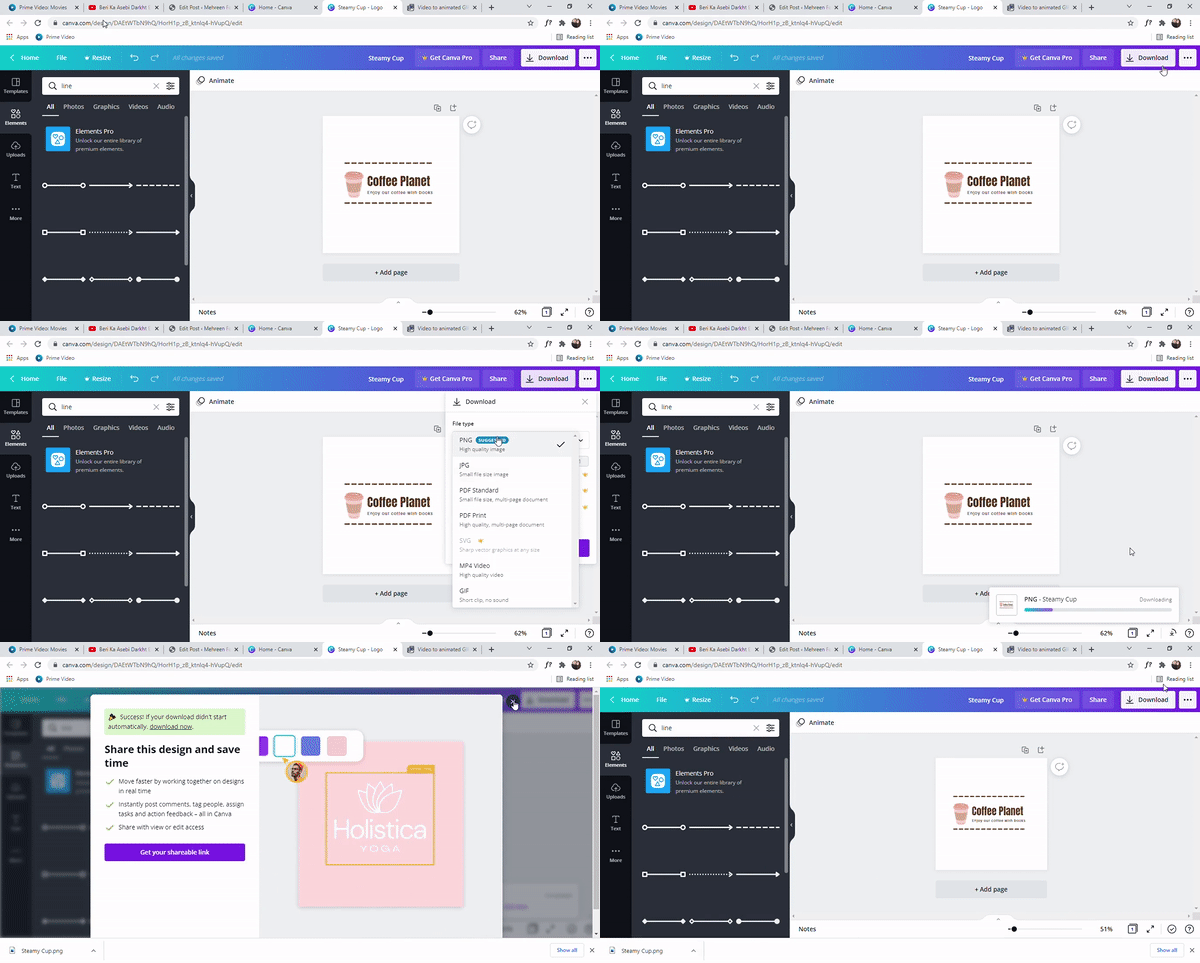
Removing the background from Canva Logo
The option to make background transparent is available only on the Canva Premium account.
So in order to make our logo background transparent, we will use another website which offers this option free.
Step 8: Open the URL https://www.photopea.com/. Go to File > Open and open your downloaded logo image file.
Step 9: Select the Magic Wand tool from the toolbar on the left side, click on the background area in your logo image and press DEL (delete) button on your keyboard. Your image will look like this:
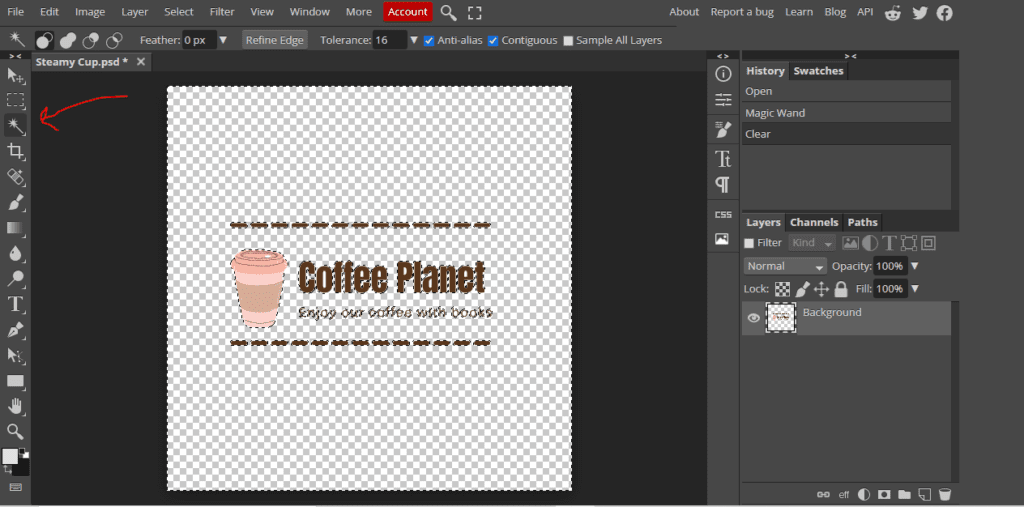
Step 10: Using the magnifying tools, zoom into the image and repeat Step 9 where background still needs to be selected and removed.
Use the Hand Tool to move around a zoomed-in image.
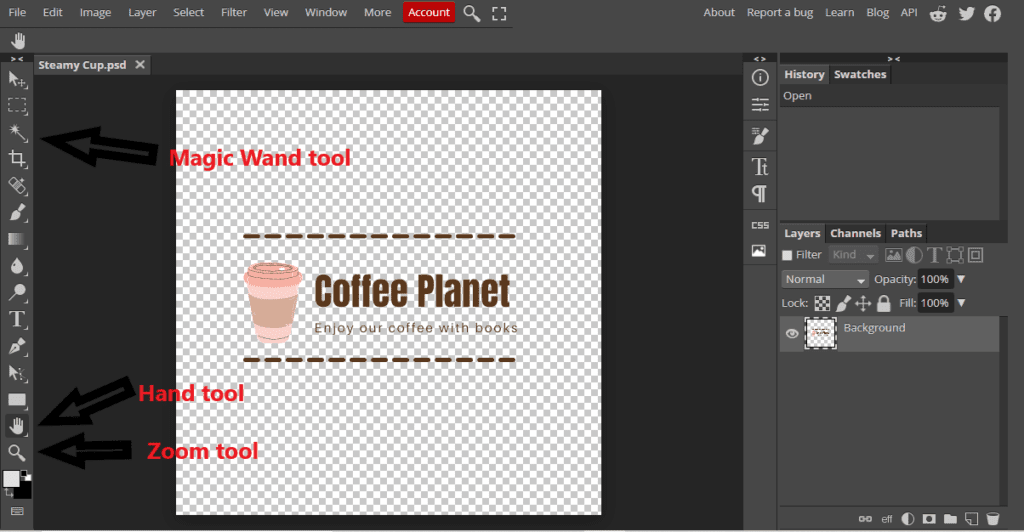
Step 11: If you wish to remove any extra blank space from around the image, then go to Image > Canvas Size. This opens a dialog box using which you can increase/decrease the canvas area of your image.
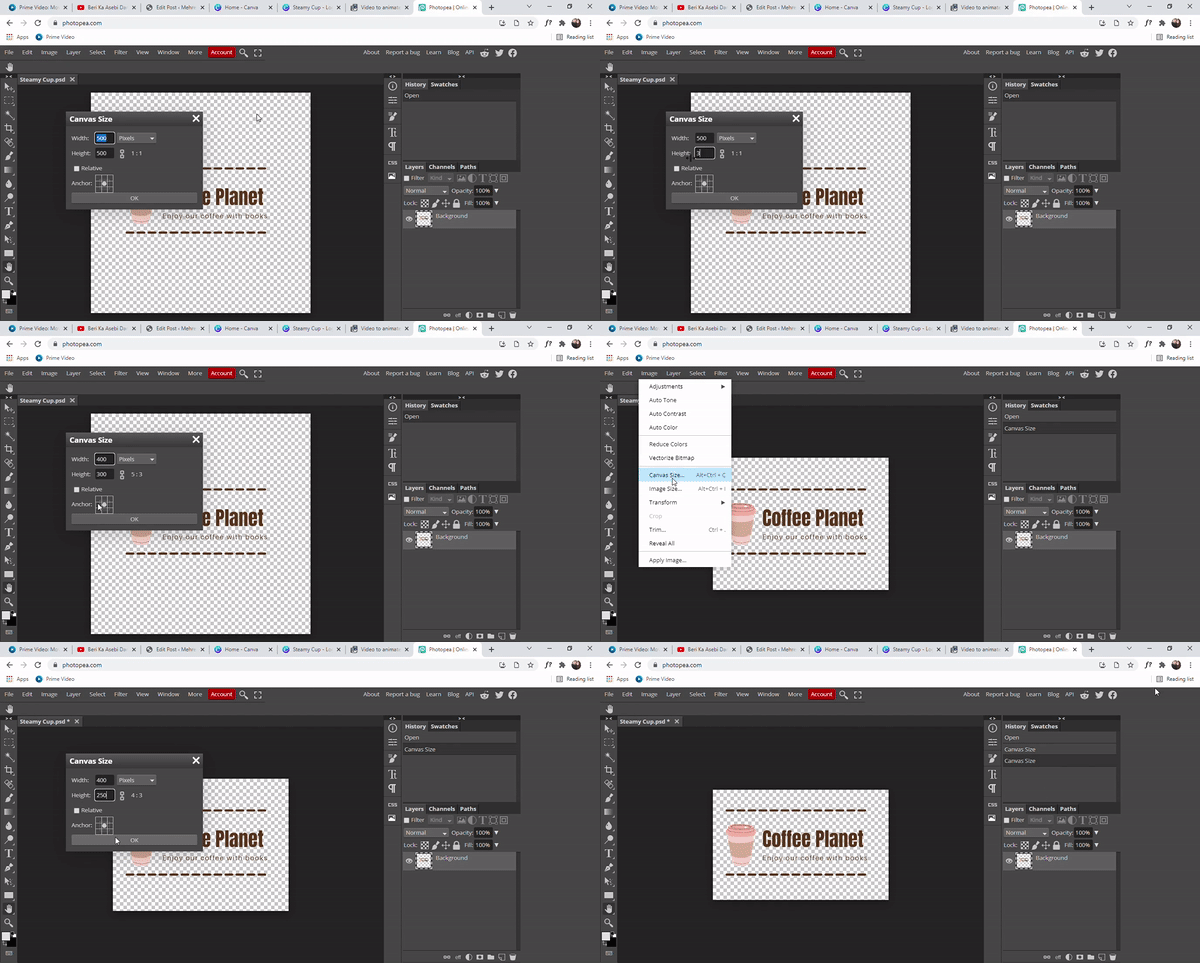
When background has been removed from all places, it is time to export this image. Go to: File > Export As > PNG.
Remember to export in only PNG as it supports transparent backgrounds as well.
Congratulations!
Your new logo is now complete!
Here it is:

If you found this article useful, consider sharing it with someone who needs to make a logo of their own.
If you have any questions while following any of the above steps, drop your queries in the comments section below and I will try my best to respond and help.


